The Easy Steps It Takes To Do an At-Home Bikini Wax for Hair-Free All Summer Long
Plus, after care advice to soothe skin
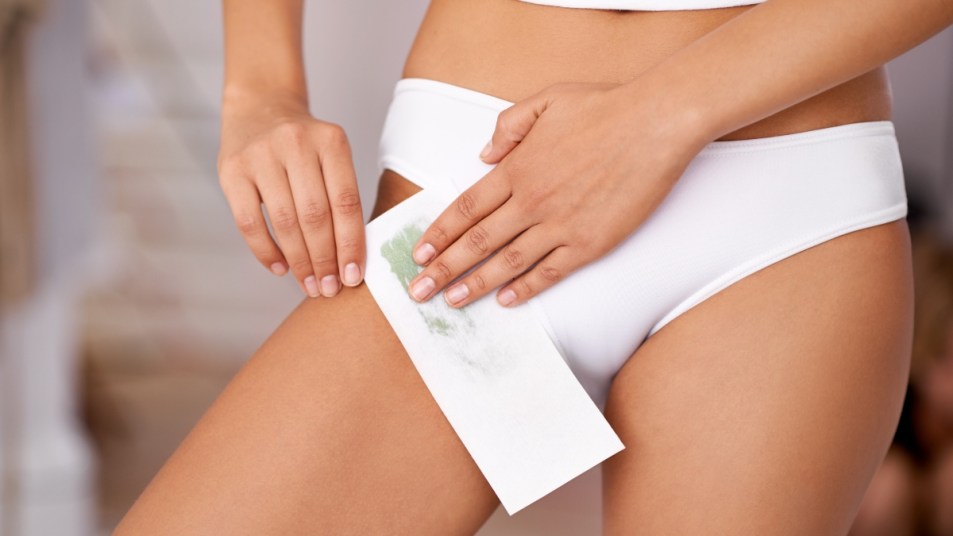
If you’re planning to spend some time sitting by the pool or beach this summer, you’re probably also thinking about how to achieve that smooth, hair-free feeling for your bikini line. But if salon appointments aren’t quite in the cards, not to worry! You can absolutely get professional-looking results from the comfort of your own home with a DIY at-home bikini wax. We tapped Rachel Lozina, esthetician and founder of Blue Water Spa in Oyster Bay and Southampton, New York, and Nicole Sandoval, senior director of learning and development and field training at European Wax Center for their best tips on how to recreate a spa-worthy wax on your own. Here’s what you’ll need to get started, along with some aftercare tips to keep your skin soothed and happy.
How to do an at-home bikini wax
Lozina says that proper application of the wax and removal can take a while for anyone to master, so be patient! With practice and following the steps below, you’ll be a pro in no time.
Related: Sugaring Is the Gentle, Effective Hair Removal Technique That’s Easy To Do At Home
At-home bikini wax step 1: Gather your supplies

What are the supplies you’ll need for an at-home bikini wax? Lozina says you’ll need the following:
- Baby powder
- Wax beads, like KoluaWax Hard Wax Beads
- Wax strips, like Pure Awareness 150 Wax Strips
- Wax sticks, like Bememo Store 500 Pieces Wax Sticks
- Wax heater, like KOTAMU Wax Kit (or ready-to-go wax strips, like Athena Club Body Wax Strips)
- Tweezers, like Revlon Slant Tweezer
- Gloves
- Scissors
At-home bikini wax step 2: Exfoliate
The day before your wax, gently exfoliate the area to remove dead skin cells and prevent ingrown hairs.
At-home bikini wax step 3: Trim hairs
Ideally, your hair should be between ¼-inch and ½-inch long for best results with waxing. Trim any hair that’s longer than this length.
At-home bikini wax step 4: Heat the wax
If using hard wax, follow the instructions for your wax warmer to heat it to the appropriate temperature. Soft wax comes pre-heated in strips for easy use.
At-home bikini wax step 5: Cleanse the area
Wipe down the bikini area with a pre-depilatory wipe or oil (these come with at-home waxing kits) to remove any dirt or residue that could prevent the wax from adhering well.
At-home bikini wax step 6: Test the wax temperature
Apply a small amount of wax to your inner wrist to ensure it’s warm but not too hot.
At-home bikini wax step 7: Apply wax
Before slathering on the wax, dust a small amount of baby powder onto skin to create a barrier. Then, Lozina says to apply wax on clean, dry skin in the direction of the hair growth and remove in the opposite direction. “Try to pull adjacent to the skin and not away from the skin,” she says. Wax is resin that is applied to the skin in the direction of the hair growth.
For hard wax: Apply a thin layer of wax in the direction of hair growth, using the applicator stick. Leave a small edge to grab onto when removing.
For soft wax: Apply the pre-warmed wax strips directly to the skin in the direction of hair growth.
Once the wax has hardened (for hard wax) or the strip is held taut (for soft wax), take a deep breath and pull the wax off in a swift, sure motion against the direction of hair growth. Keep your skin taut to minimize discomfort.
At-home bikini wax step 8: Repeat

Continue applying and removing wax in small sections until all unwanted hair is removed.
More at-home bikini wax tips
As far as how long the results last, it’s important to note that each person’s hair cycle is different. “You can expect waxing to last a little bit longer, from six to eight weeks,” says Lozina. And as with any new hair removal method that you’re trying at home, if you’re worried about a skin reaction, start with a small area first, she suggests. “If that works successfully, move onto bigger areas,” she says. “I would recommend saving the bikini area after you’ve successfully tested your skin in other areas, as the skin in the bikini area can be sensitive.”
Related: Menopause Facial Hair: Dermatologists Reveal the Best Ways to Remove It at Home
Post-waxing care tips
“The bikini area is more prone to ingrown hairs because we tend to cover this area with pants and underwear and it stays hot and sweaty,” says Lozina. Bacteria in this environment thrives because there’s no fresh air flow. Chafing is also common down there, she explains, because the skin folds so it’s prone to chronic skin irritation which can cause ingrown hairs.
“The best aftercare for hair removal is to keep skin hydrated and stay out of the sun,” adds Lozina. “The aftercare remains the same for all types of hair removal. Keep it simple and try not to sweat.” Also, she says not to exfoliate the areas where hair has recently been removed or use any scrubs, alpha hydroxy acid, beta hydroxy acid, benzoyl peroxides and salt water for a couple of days after waxing as these can irritate the skin. More specifics below!
1. Wear something breathable clothing immediately after your wax treatment
Sandoval says she recommends wearing anything loose and comfortable that lets the area breathe, as well as anything cotton-based.
2. Use lukewarm water in the shower
Further, Sandoval says that when showering after a wax, make sure to use lukewarm or cooler water as hot showers can dehydrate the skin. “You should also avoid hot tubs, lakes and saunas right after your wax,” she adds.
3. Avoid certain ingredients
“Remember your skin is freshly exfoliated from your wax so don’t use any harsh soaps or body washes that contain too many oils or leave a film on your skin,” advises Sandoval. She recommends using products with the below ingredients:
- Tea tree oil: It’s antibacterial, and keeps pores and skin clean, she says.
- Aloe vera: This is anti-inflammatory, and helps calm skin.
- Chamomile: It soothes skin and reduces redness.
- Green tea: The tea provides nourishment to the skin, is anti-inflammatory and calming.
- Glycerin: This ingredient is gentle and helps moisturize skin.
4. Keep ingrowns at bay
European Wax Center Ingrown Hair Mist keeps even the most hard-to-reach areas bump-free between waxes, says Sandoval. It contains AHAs and BHAs, including glycolic, lactic and salicylic acids that gently exfoliate ingrown hairs and bumps. “The quick-drying, continuous spray formula doesn’t need to be rubbed in and is great for all-over use, especially those super hard-to-reach areas like the back and legs,” says Sandoval.
Related: This $5 Medicine Cabinet Staple Prevents Ingrown Hairs After Waxing
For more on hair removal, click through these stories:
How to Tweeze Eyebrows: Experts Share Top Tricks + Why It’s Best for Women Over 50
At-Home Laser Hair Removal: How to Get Smooth Skin for $100s Less Than Salon Treatments
Oilplaning Steps and How to Do This Viral Trend That Makes Skin Look Smoother and Youthful Instantly